

Cycling
I was interested in the Zwift Academy workouts as I had not tried workout mode it since the first time it was released more than 6 months ago. The Academy workouts are available to all Zwift users for free. See pic below where they are located in the workout mode.
You can select any route you would like to view while executing the workout as terrain, laps, sprints/KOM and power-ups are not available to you in this mode as they may affect the output of your workout.
Using my standard setup of power meter and Kickr (that simulates the terrain in game) and I selected the first workout and got stuck into it. The first thing I noticed was it was NOT using the Kickr to hold the wattage at the target range. I had no idea what I needed to select and was already into the workout. The format of the ride looked pretty easy so I just ran with those settings.
If you change your setup when you load Zwift to not use the power meter and swap it to the Kickr/smart trainer for the power source, then the options menu for the workouts show that they are in Erg Mode and the game will adjust the resistance for you based on the prescribed interval. I am going to try this for my next workout session (see image below).
One rookie error was I forgot to turn on the fan at the start of the session (the room was still cold), so I stopped and turned it on while still in warmup task. This was fine and I passed it with my first GOLD STAR!
Another thing to note, the colour of the progress bar at the bottom of the screen does not indicate if you are in the correct zone for the workout (eg: green does not mean you are on target), the colour indicates how close to threshold or which power zones you are exercising in. (eg: grey is recovery, blue is moderate, green is below threshold, etc) If you sit too far above/below the zone you are targeting, a message will pop up underneath the workout box in the middle of the screen to go faster of slower. This generally kicks in +/- 20watts from my limited testing.
If you are finding the resistance on the trainer is not at the right level to match the "road feel" or gear ratio you are expecting indoors, you can adjust this on the phone app via the Resistance UP/Down buttons. Most Kickr users have this set to around 50-70%
There were a few things I would re-design in this first workout. The 5mins rests after the 5min intervals and after the sprints were redundant as they were at the same power level as the 20min steady state section.
During the cool down you end up doing more watts than the steady state before winding down.
Overall I received 5/6 STARS on the workout and was a little perplexed. When I downloaded the file to Training Peaks and analysed it, all seemed perfect. There were 2 spots where the power dropped to zero - when I turned on the fan in warmup and when I answered the front door in a rest period for 30 seconds. As I got a star for the first time I stopped, I don't think the second interruption would affect the result. The power for the 2x 5min intervals were spot on as well and only differed by ~2watts between them so hopefully there will not be any other issues with future workouts that are more complex.
Zwift Academy Workout Mode
In case you were wondering where the update was for last week, I came down with another head cold and took some time off the bike. Now I'm back into workouts and ramping up the training.I was interested in the Zwift Academy workouts as I had not tried workout mode it since the first time it was released more than 6 months ago. The Academy workouts are available to all Zwift users for free. See pic below where they are located in the workout mode.
You can select any route you would like to view while executing the workout as terrain, laps, sprints/KOM and power-ups are not available to you in this mode as they may affect the output of your workout.
Using my standard setup of power meter and Kickr (that simulates the terrain in game) and I selected the first workout and got stuck into it. The first thing I noticed was it was NOT using the Kickr to hold the wattage at the target range. I had no idea what I needed to select and was already into the workout. The format of the ride looked pretty easy so I just ran with those settings.
 |
| Note the "No ERG w/power meter" option at the bottom |
If you change your setup when you load Zwift to not use the power meter and swap it to the Kickr/smart trainer for the power source, then the options menu for the workouts show that they are in Erg Mode and the game will adjust the resistance for you based on the prescribed interval. I am going to try this for my next workout session (see image below).
 |
| This is the Power Source/Controllable Trainer setup you need to use to get ERG mode to work |
One rookie error was I forgot to turn on the fan at the start of the session (the room was still cold), so I stopped and turned it on while still in warmup task. This was fine and I passed it with my first GOLD STAR!
 |
| Settling into the intervals |
 |
| My little avatar heading toward the epic KOM after the 1st Sprint (see red block) |
If you are finding the resistance on the trainer is not at the right level to match the "road feel" or gear ratio you are expecting indoors, you can adjust this on the phone app via the Resistance UP/Down buttons. Most Kickr users have this set to around 50-70%
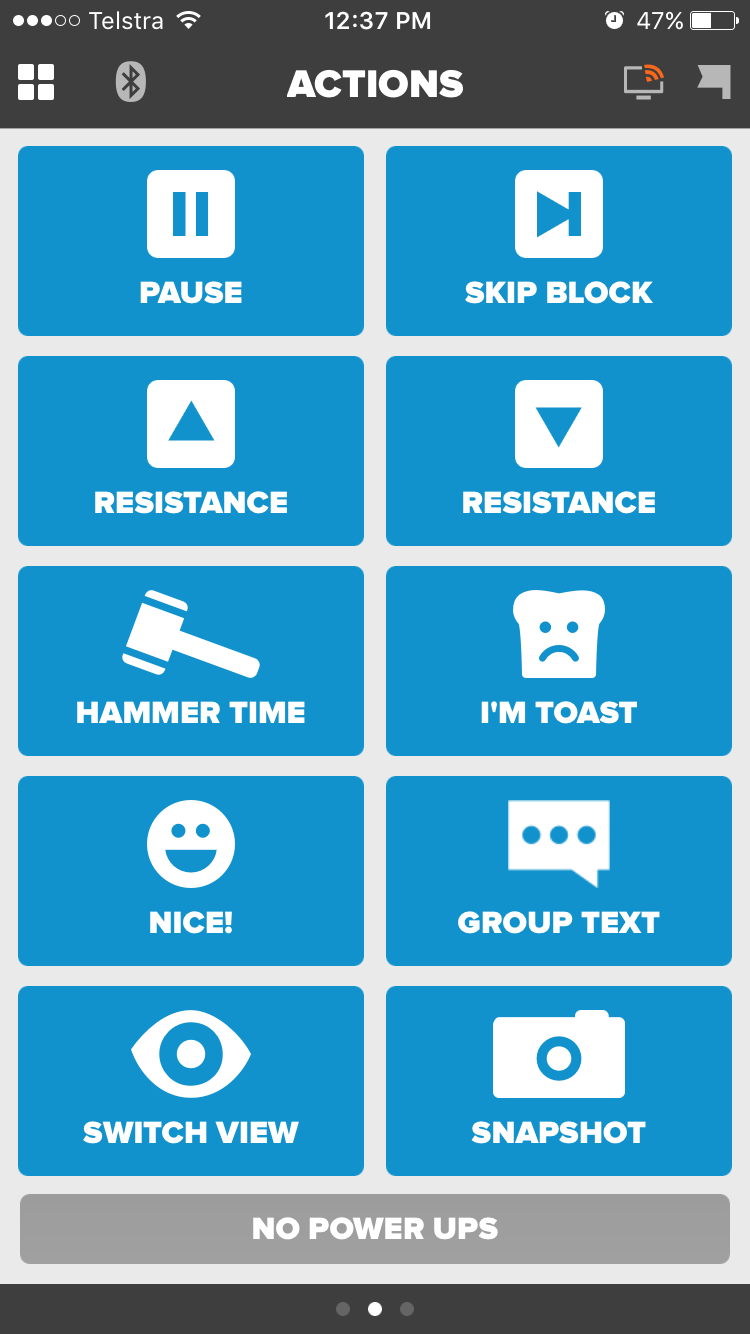 |
| The iPhone companion app |
There were a few things I would re-design in this first workout. The 5mins rests after the 5min intervals and after the sprints were redundant as they were at the same power level as the 20min steady state section.
During the cool down you end up doing more watts than the steady state before winding down.
 |
| My avatar in workout mode - a little screen in front of their faces that other riders can see |


